Print Options:

Korean Cubed Radish Kimchi (Kkakdugi)

Korean Radish Kimchi (Kkakdugi) in a white ceremic bowl placing on a wooden table
Cuisine
Courses
Difficulty Beginner
Time
Prep Time: 1 hr Cook Time: 5 mins Rest Time: 15 mins Total Time: 1 hr 20 mins
Servings 10
Best Season Suitable throughout the year
Description

Looking for a bold and tangy side dish? Try Kkakdugi, the Korean radish kimchi that's packed with flavor and crunch! Made with simple ingredients like fresh radish, garlic, and spicy gochugaru, this easy-to-make kimchi is perfect for adding a burst of flavor to any meal. Whether you're a kimchi lover or a newbie, this recipe is sure to delight your taste buds!

Ingredients for Radish Kimchi
    Main
  • 1.1 kg (2.5) pounds Korean radish (or other variety of white daikon radish) (rinsed and skin peeled)
  • 3 stalks (50g, 1.8 ounces) green onion (rinsed)
  • 2 Tbsp raw sugar
  • 2 Tbsp rock salt (or Korean coarse salt)
  • Radish Kimchi Base
  • 1/2 small brown onion (70g, 2.5 ounces)
  • 1/2 small (50g, 1.8 ounces) red apple (seed and core removed, cut into small pieces to blend)
  • 3 Tbsp Korean fish sauce (( I used anchovy sauce ))
  • 1 Tbsp Minced garlic
  • 1/2 Tbsp Minced ginger
  • 4 Tbsp Korean chili flakes ((gochugaru))
  • 1/4 cup water
  • 1 Tbsp rice flour
How to Make Radish Kimchi
  1. Cut the radish into medium sized cubes. (It could be smaller or bigger if that’s what you prefer.
  2. Just be mindful that the radish will shrink as they go through the fermentation process.)
  3. Put the cubed radish into a large mixing bowl and add the sugar and the salt and mix them well.
  4. Leave it for 1 hour at room temperature.
  5. While waiting, chop the green onion into small pieces and make the kimchi base. Blend the onion and apple with the fish sauce in a blender. (It can take a few minutes as the liquid isn’t as much as the solids.)
  6. Make the rice porridge by mixing the water and the rice flour in a bowl and heating them up for 1 min in a microwave. (It could be shorter or longer depending on the output power of your microwave).
  7. It should give you a mildly runny porridge texture. Mix all the kimchi base ingredients (*except for 2 Tbsp of Korean chili flakes) in a medium sized bowl.
  8. After one hour, rinse the radish in cold running water a couple of times and drain any excess water for 5 mins.
  9. Put the radish into a clean mixing bowl and add 2 Tbsp of Korean chili flakes. (Put a food prep glove on.)
  10. Mix the chili flakes with the radish evenly. (By adding this chili flakes separately and earlier than rest of the kimchi base, you are giving a nice vibrant colour to the radish. Also, my mum believes that it will help the kimchi base to smear well into the radish). Add the chopped green onion and the kimchi base and mix them evenly and thoroughly.
  11. Move the seasoned radish into an air tight glass container (1.5L glass jar for the above-listed quantity) and leave it at room temperature for between 6 to 24 hours depending on the temperature (I left mine out for 1 day with early spring temperature.).
  12. After that keep it in the fridge. (The best temperature for storing any kimchi is 6 degree Celsius (42.8F).)
Nutrition Facts

Servings 10


Amount Per Serving
Calories 38kcal
% Daily Value *
Total Fat 0.3g1%
Total Carbohydrate 7.5g3%
Dietary Fiber 1.6g7%
Sugars 3.3g
Protein 1g2%

* Percent Daily Values are based on a 2,000 calorie diet. Your daily value may be higher or lower depending on your calorie needs.

Note
  • Rice flour is used in this recipe to make the kimchi paste stickier, allowing it to adhere better to the radish. It also helps encourage the growth of beneficial probiotics, which are key to the fermentation process and enhance the flavor. If you don’t have rice flour, you can substitute with sweet glutinous rice flour or even all-purpose flour—though I haven’t personally tried these alternatives, many Koreans use them successfully.
  • If you find adding the chili flakes in Step 4 to be a bit tedious, feel free to mix them into the kimchi paste in Step 2 for a quicker prep.
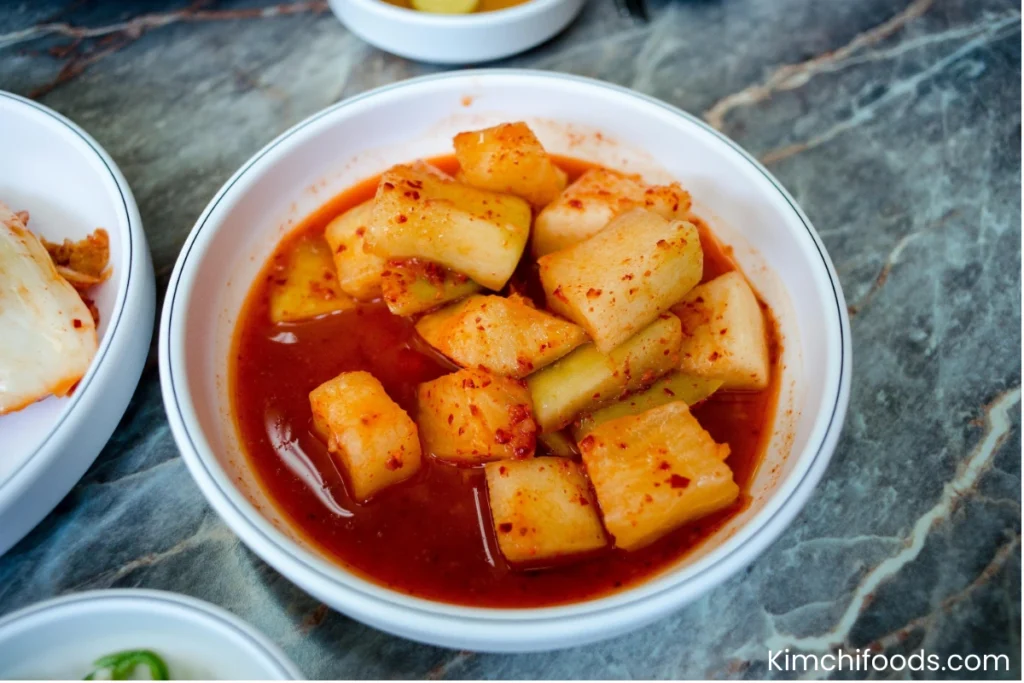
  • Your Kkakdugi will start to taste delicious by Day 3. While you can eat it earlier, the radish may still have a slightly raw taste. Allowing it to ferment fully will bring out the best, tangiest flavors!
Keywords: Kkakdugi recipe, Korean radish kimchi, Homemade kimchi, Cubed kimchi, Korean kimchi side dish, Spicy radish kimchi, How to make Kkakdugi, Easy kimchi recipe, Korean pickled radish, Fermented radish recipe, Vegan Kkakdugi, Korean side dishes, Gochugaru kimchi, Traditional Korean kimchi, Daikon radish kimchi, Kimchi with gochujang, Quick kimchi recipe, Healthy Korean snacks, Spicy kimchi side dish, Fermented foods recipes
Samantha Doe
Food and Lifestyle Blogger

Hi, I'm Samantha, a full-time food blogger, mother of 2 beautiful daughters and a lovely wife. I live in New Jersey with my family. Loves traveling, sharing new recipes, and spending time with my family.